

Pole dancing was one relegated to the strip club. Not anymore! Pole dancing — also called pole fitness — has broken into the mainstream as a full-body workout for “civilians” (the term used by sex workers to refer to recreational pole dancers).
Pole dancing builds strength, flexibility, and agility. Like most sports and movement practices, it has positive mental health effects like grounding a person in their body, promoting body-positivity, and building a community.
This new popularity for pole dancing is due to the progressive de-stigmatization of sex work, but hobbyists should not appropriate stripper culture without acknowledging its history. Elevate sex workers’ voices and advocate for them: take pole classes directly from sex workers when possible, follow sex workers on social media, and support governmental policy reform that decriminalizes sex work.
Unlike yoga or ballet, there are no “standard” names for pole movements or shapes. Pole dancing evolved from a variety of different sex worker communities without a central governing organization to regulate this “sport” until 2009 with the launch of the International Pole Sports Federation. Pole dancing movements have different names in different regions or studios. For example, what I know in Chicago as a “wrist sit” is the same as what I was taught in Boston as a “Hello Boys.”
It is not recommended to use just any pole for Pole dancing. Professional poles are designed to be safe carrying the weight of a body either in static or spinning mode, and these poles are either pressure-mounted or bolted into the ceiling (the leading brand of poles is called X-Pole). A portable alternative is the X-Stage — an unmounted pole on a small stage. Poles are pricier investments, so a studio like Chicago’s Fly Club is a convenient option for a beginner.
Here are some basic moves to get started!
Fan Kicks
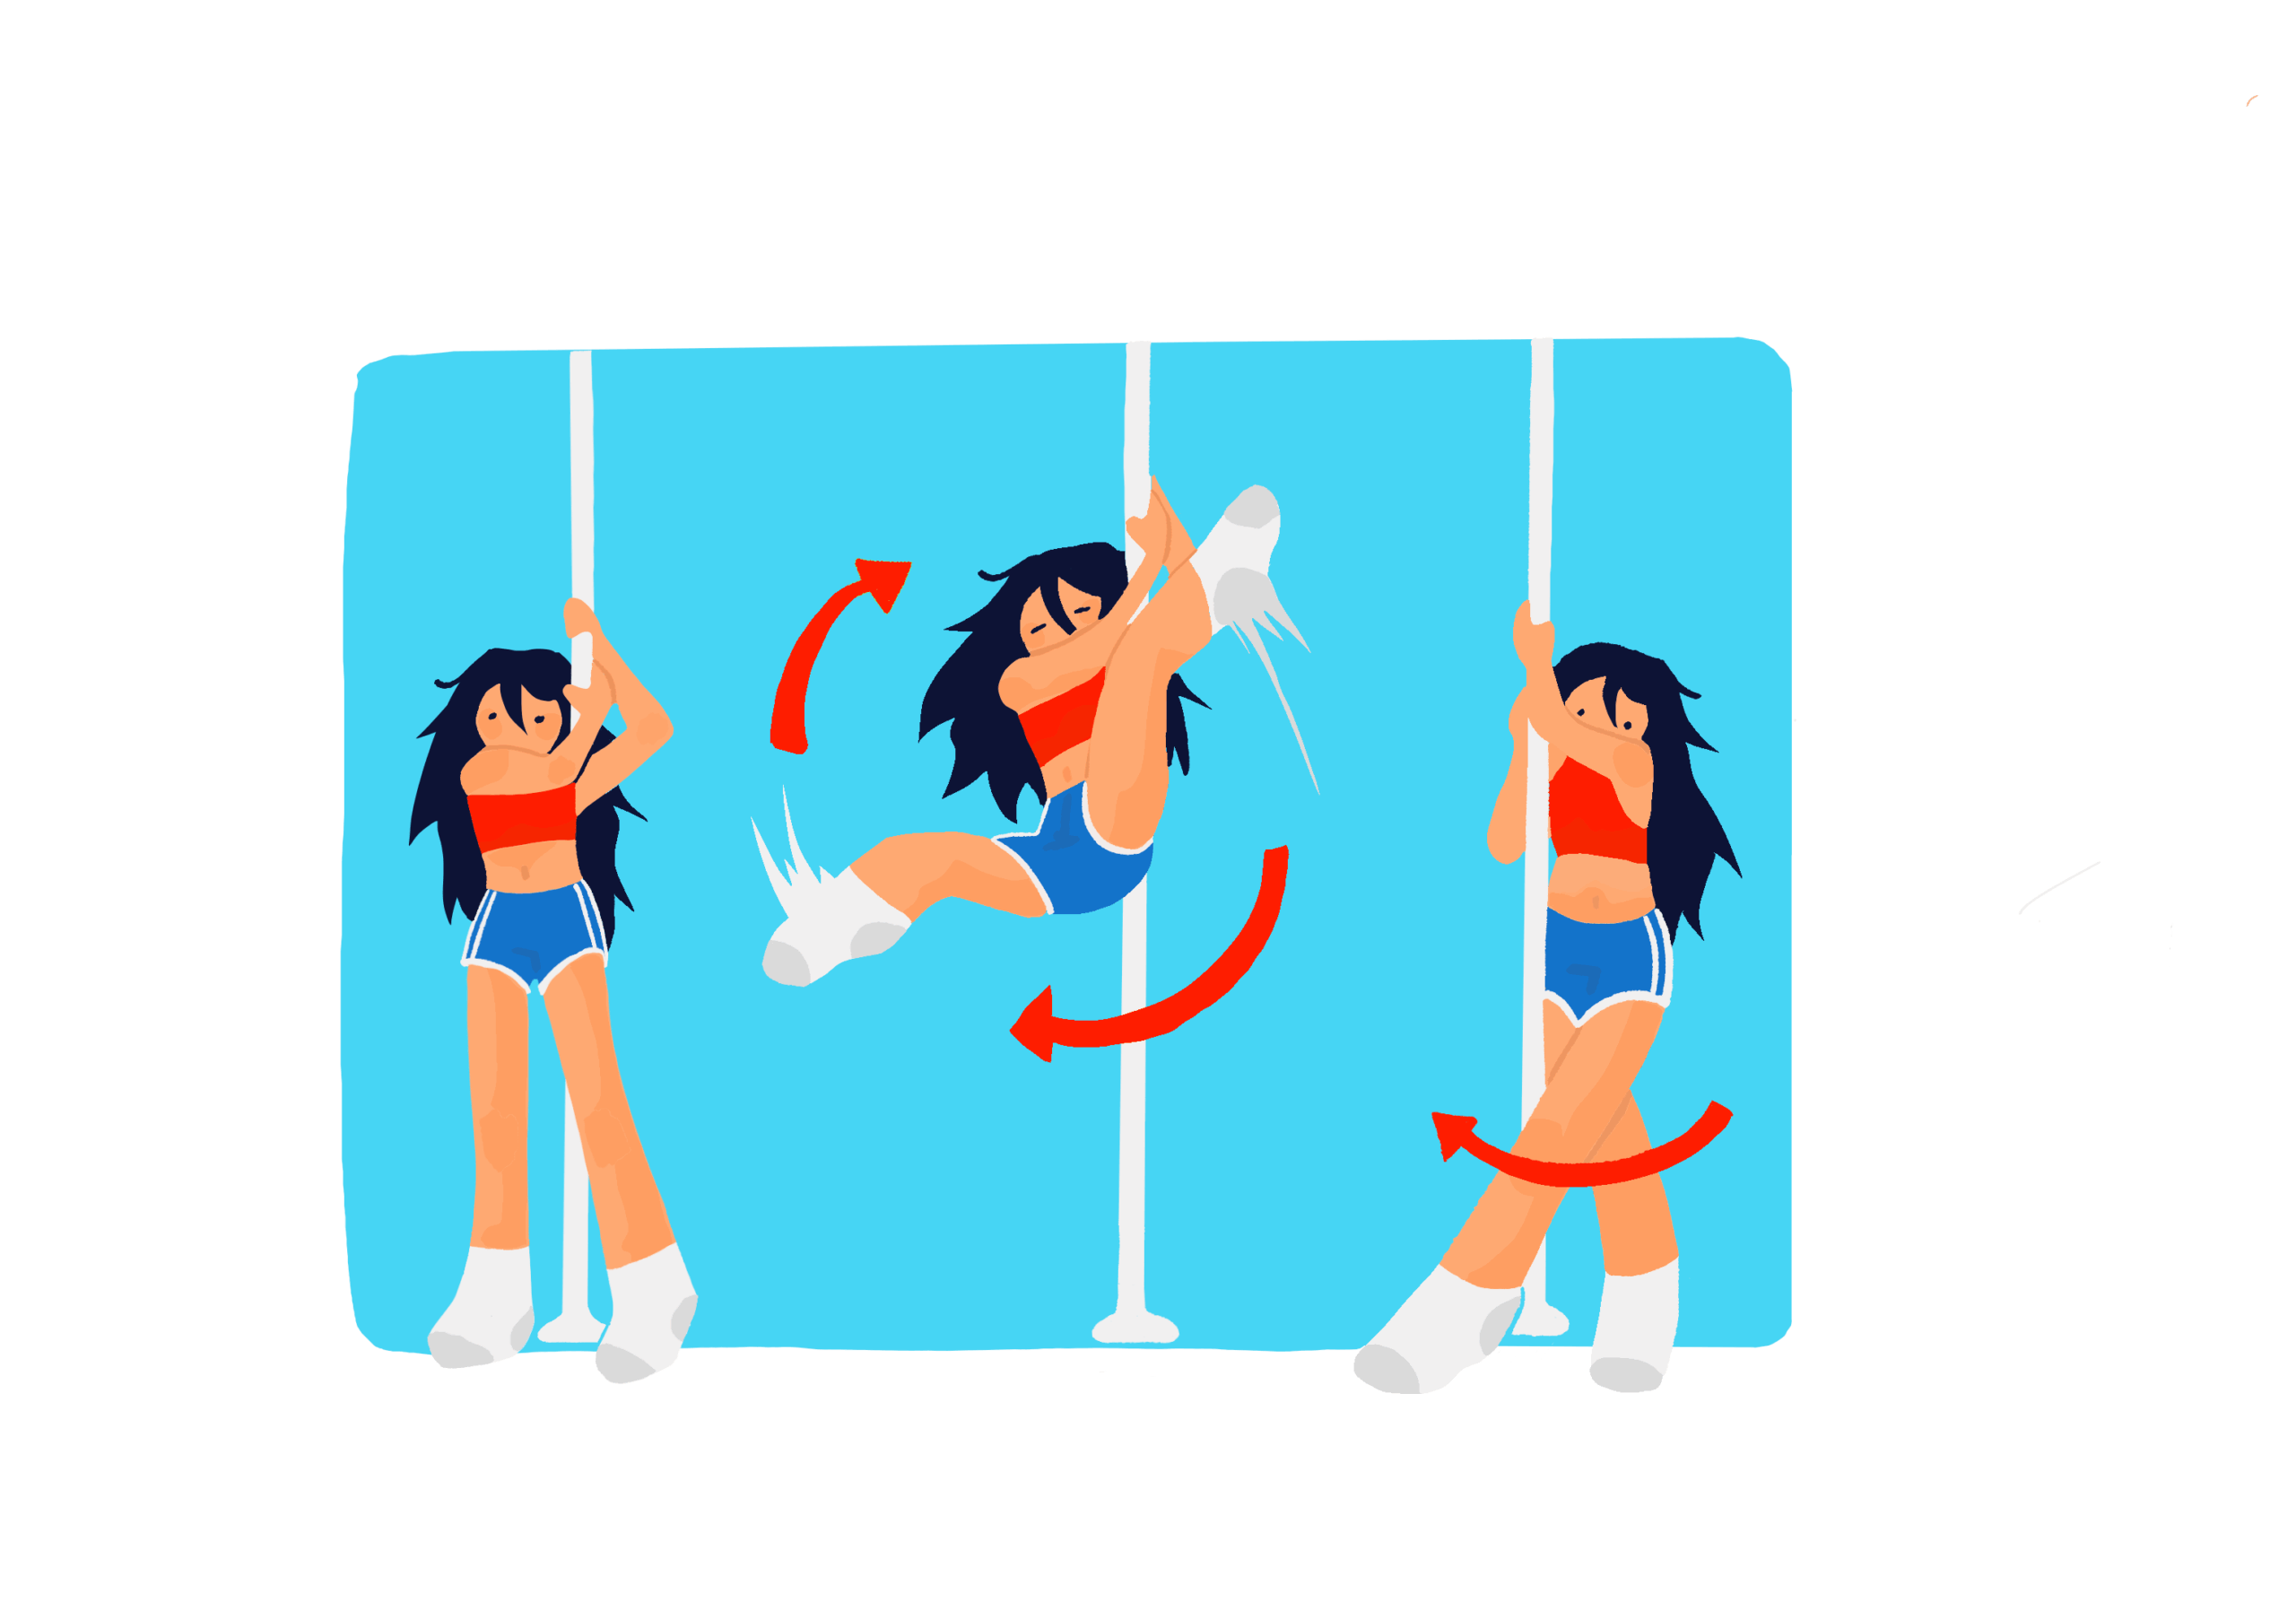
- Begin with your hips in front of the pole and chest slightly behind the pole. Hold the pole tightly with both hands in true grips (natural first around the pole with the thumb opposite the four fingers) at head level.
- Swing the inner leg (the one closest to the pole) outward and above in a big circular motion. Let the other leg follow the circular shape. Both legs will be in the air at one point.
- Land on the ground with one foot after the other. Finish the move by turning towards the pole in a little spin and an outstretched leg.
SAFETY TIP: If your hands are sweaty, use a pole grip! Grips come in different textures — from waxy pomades to chalky liquids — and can be easily purchased online or in studios.
Wrist Sit
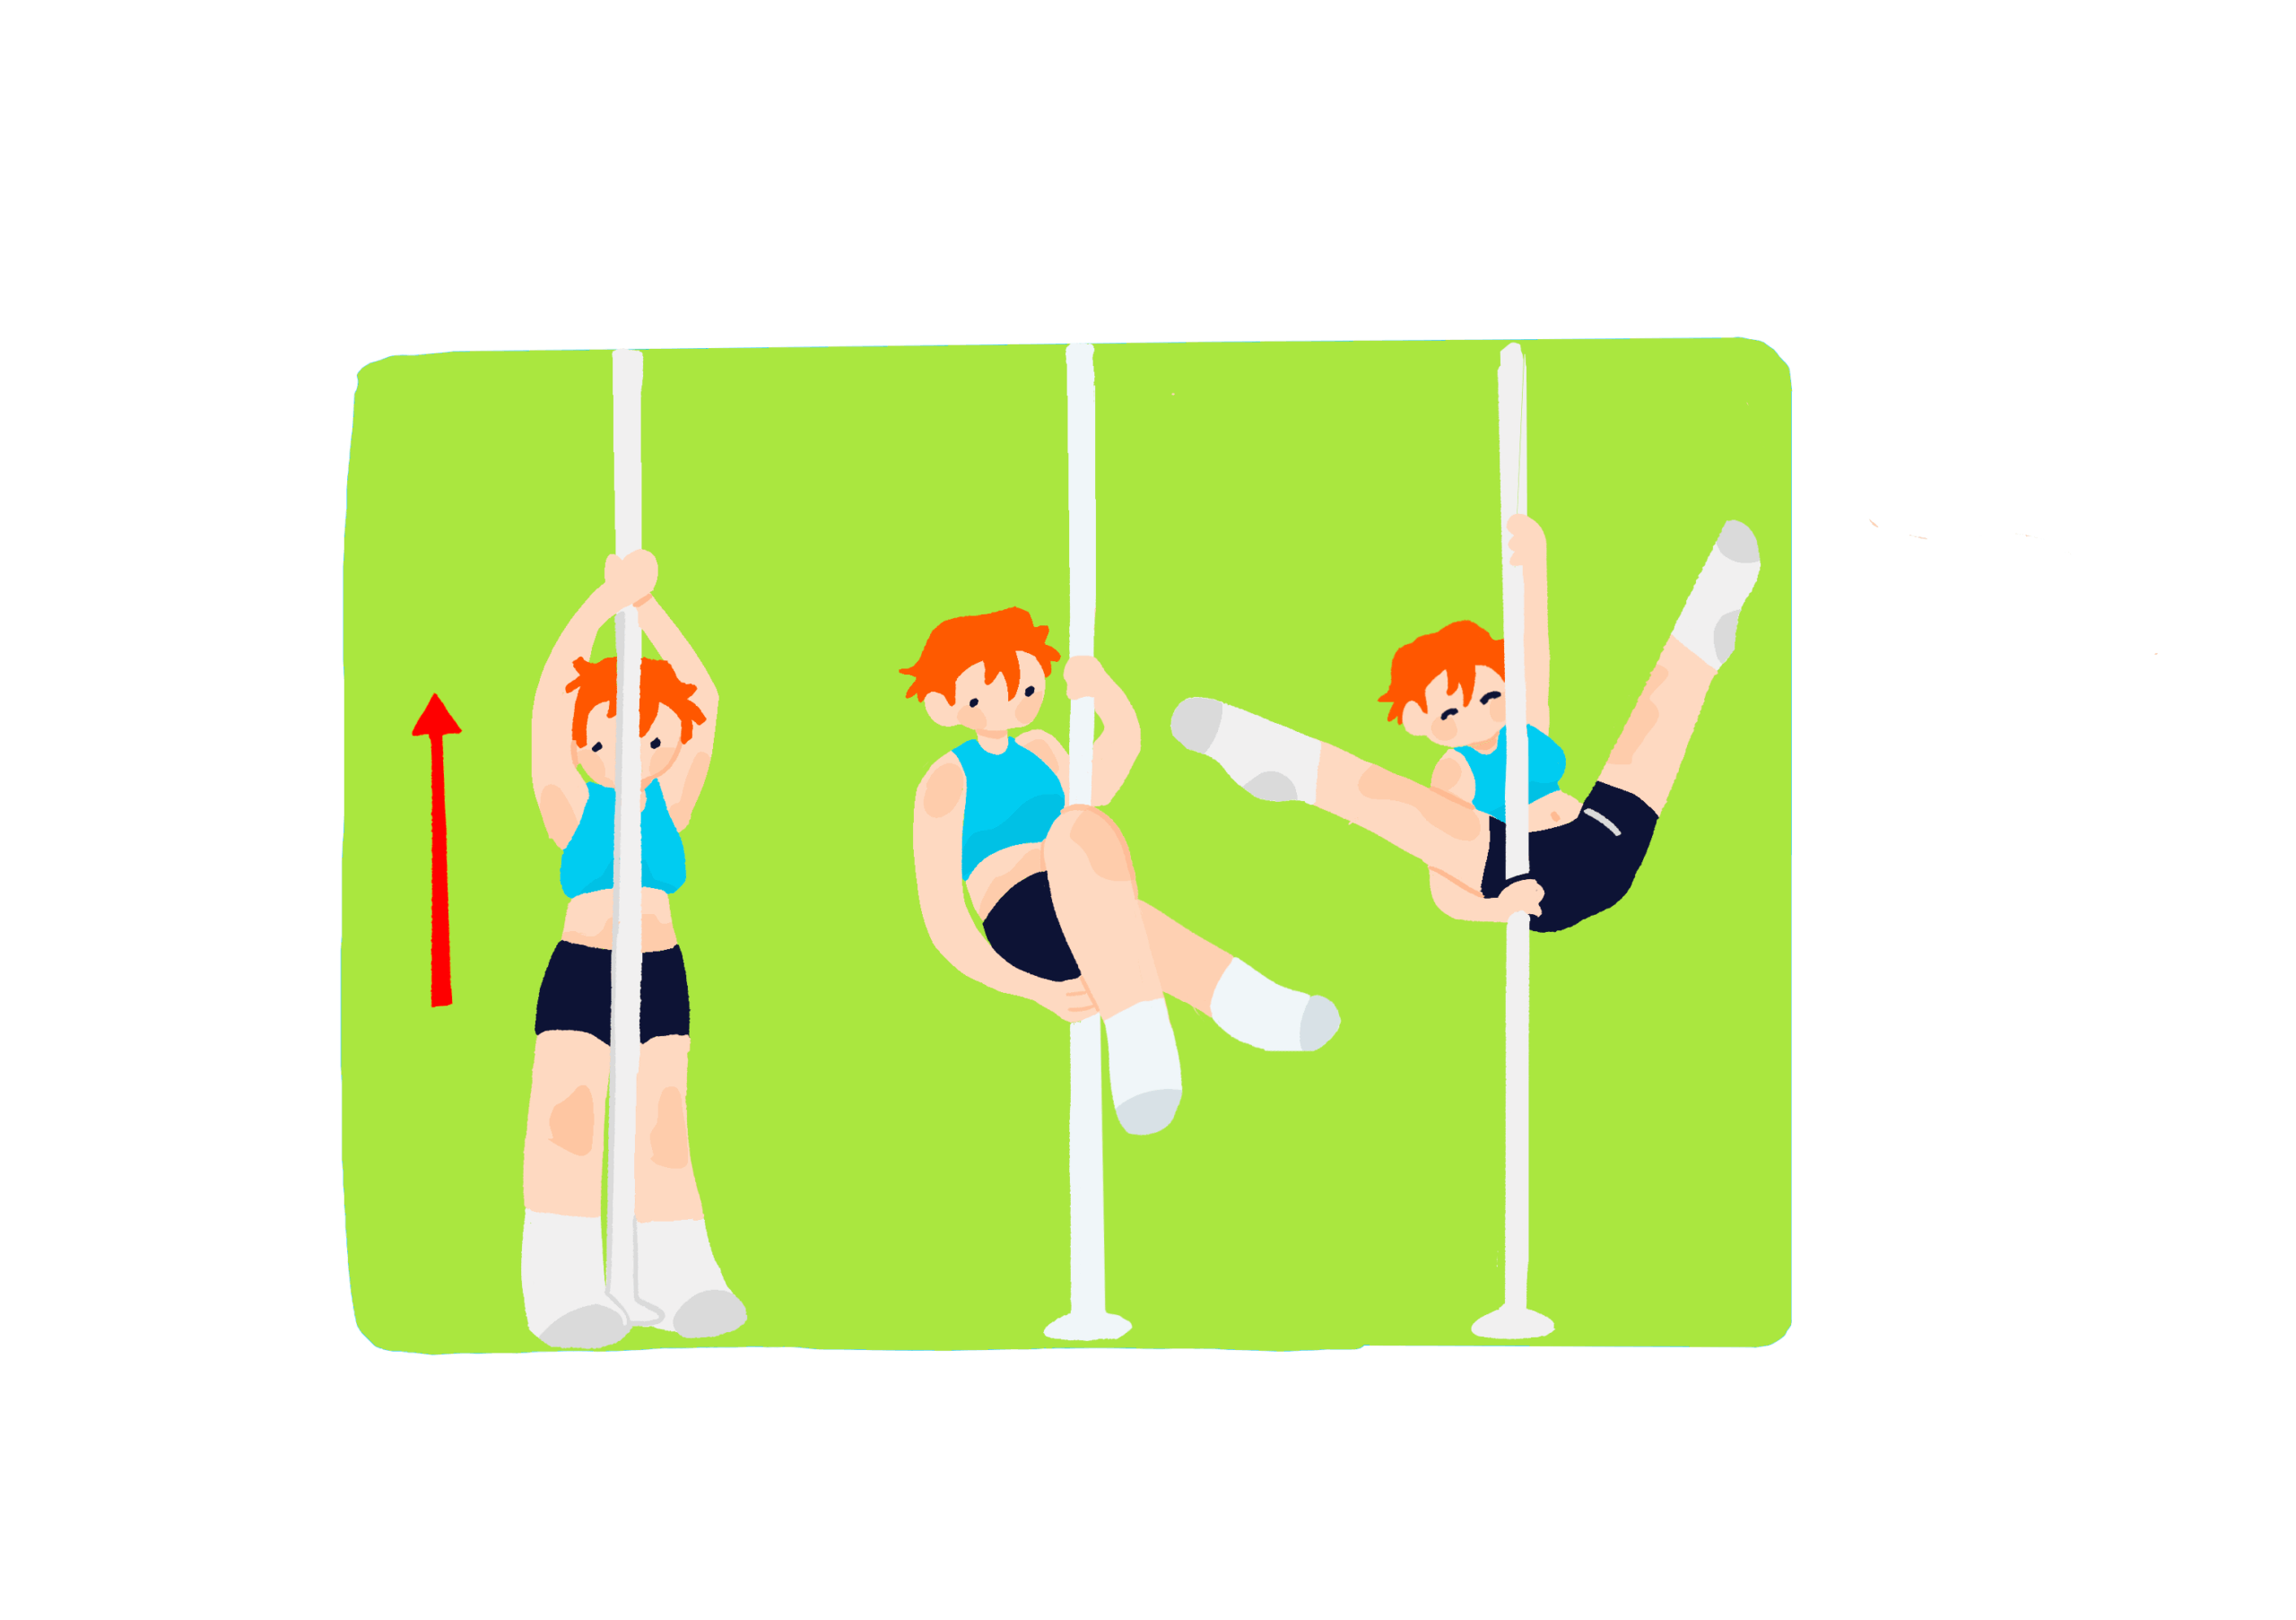
- Begin behind the pole with both hands in true grips as high above as possible. The upper hand will become the inner hand and the lower hand will become the outer hand. Lift your body until your hands are at head or chest level. (A little jump is okay to help with lifting the body).
- Wrap extended legs around the pole and apply pressure with your thighs to sit on the pole. Lock in the pole sit by tilting the outer hip (farthest from pole) downward. This will create more surface area and tightness in the thighs for a stronger grip.
- Place the outer arm under the butt. Rest the weight of the body on the inner thigh of the outer leg (same side as hit tilt and hand under butt). Release the pole sit and extend both legs into the air.
SAFETY TIP: DO NOT PUT WEIGHT ON YOUR WRIST! Body weight should be distributed between the top arm and the thigh.
EASY TIP: The lower your top arm is, the farther down you can tilt your back, and the more extended you can do your leg split. It’s physics: the weight of your back will serve as a counterbalance.
Martini
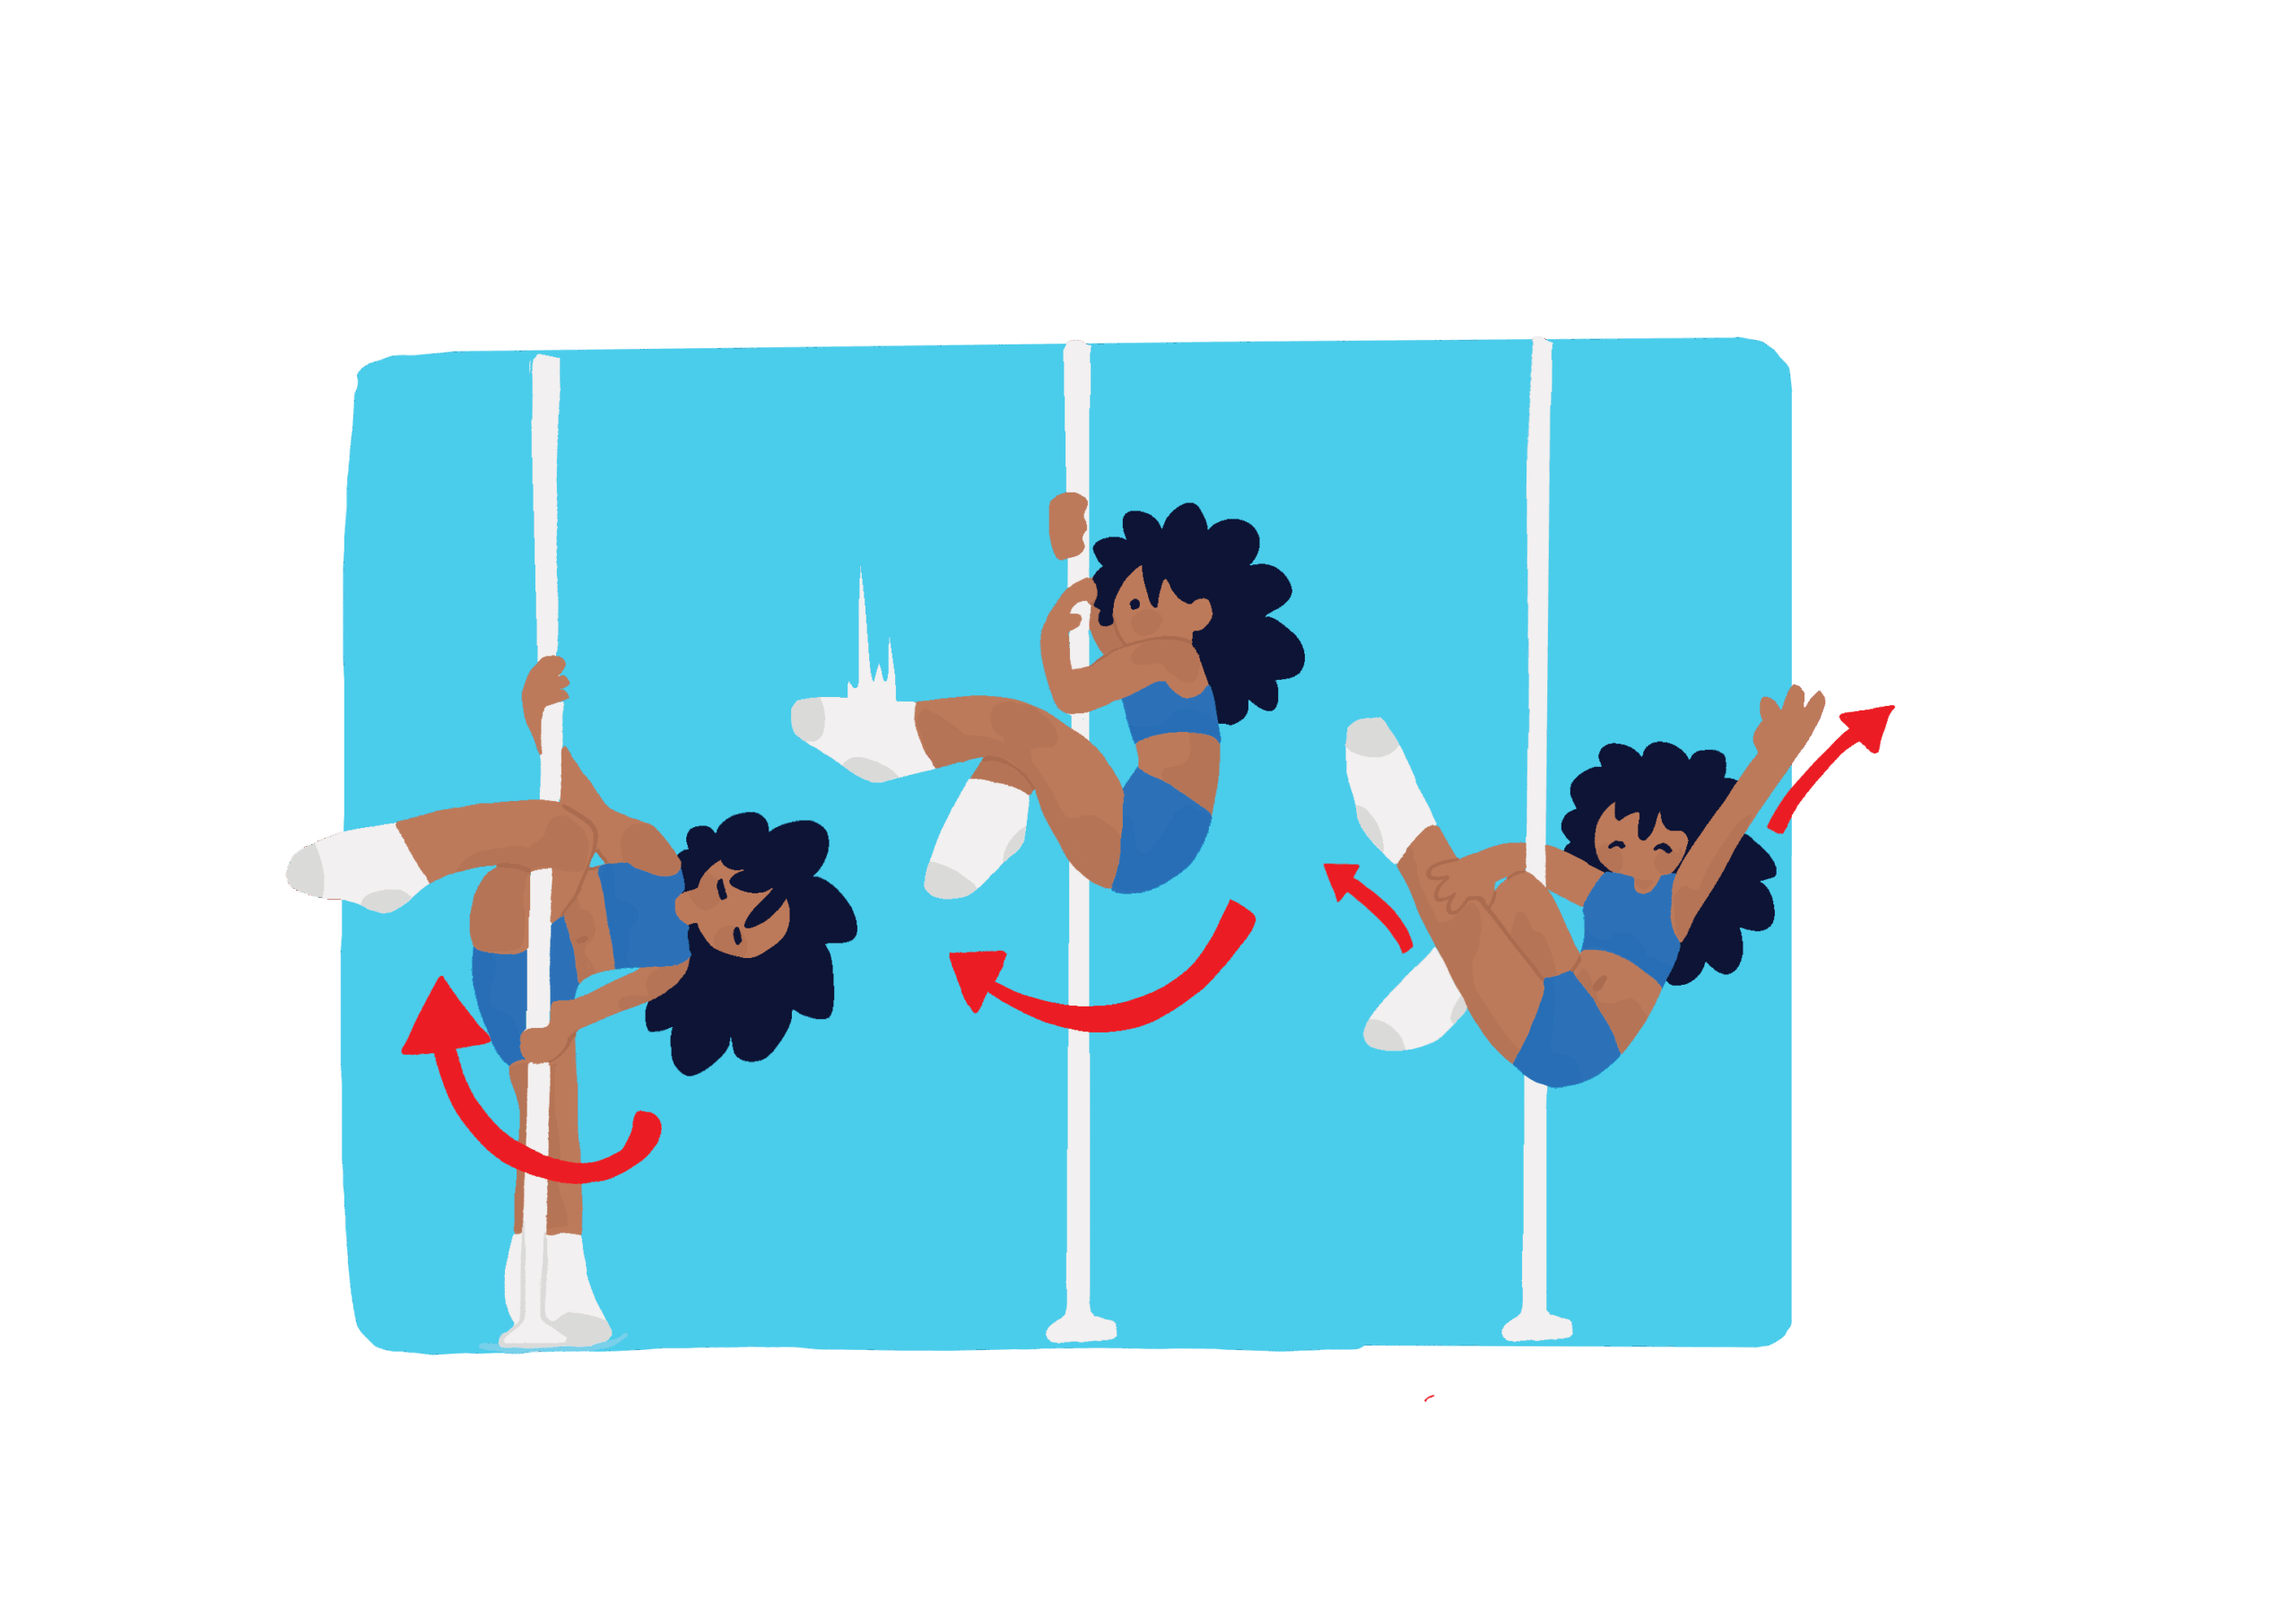
- Begin by standing behind the pole. Inner hand is in true grip above the head. Lift the upper leg as tall as possible. Hook pole strongly with the back of your knee (the knee-pit, if your will). Apply more pressure to the knee-pit by moving the ankle down and towards the butt.
- Hold the pole with the outer hand as the top hand, and the inner hand as the bottom hand. Swing extended leg in front of the hooked leg and point extended leg at an angle towards the ceiling. Both legs will be in front of the pole.
- Hook the inner hand around the pole with the inner elbow (the elbow-pit, if you will, again). Place the inner hand on the extended outer leg to apply pressure for the elbow-pit. Extend the outer hand with grandeur.
ADVANCED: Martinis can be transitioned into an intermediate pole shape called a Jasmine. A Jasmine is where the top leg hooks the pole with the back of the knee, but the bottom leg is swung behind the pole to hold pressure with the divot between the upper high and the hip.
Disclaimer: Pole Dancing does not come without risk. Falls and injuries are common. Sisel Gelman is not a trained pole dancing teacher, and therefore, this article is just a series of suggestions. Pole dancing beginners may experience heavy bruising on body points of contact with the pole.


